woensdag 15 mei 2013

Healthy wheatgrass - grow it yourself


Wheatgrass
They say its really healthy...wheatgrass. So i thought I'd give it a try. You can take it as a powder, a pill or the cow way... just eating grass. 

Benefits
I'm not a nutritionist buts here are my findings on the benefits of wheatgrass. Its detoxifying. Lowers blood pressure. It's cleansing. It contains lots of vitamins and minerals. It's an energy booster. And lots more.

How to grow it
Growing wheatgrass is very easy. You can bur the seeds in your local bio-shop. I'm Dutch so they are called 'tarwegraszaad'. 
You just have to take a plastic tray and put some cotton pads in it. Add some water to it. The first day you can add a lot of water. When you tilt the tray it should flow a little. Put the seeds in it. It will take around seven or eight days to grow.  


How to use it
When its fully grown you can juice it or mix it in a smoothie.


zondag 12 mei 2013

Summer Smoothie


I just got into making smoothies. To be honest, at first I didn't really like them. If you make one with vegetables they are hard to drink. Recently I thought I give it a try again. I looked up some recipes and they turned out great. I make them for breakfast quite a lot now. Here is the recipe of the one above:

Ingredients:

  • Frozen summer fruit
  • 1/2 banana
  • Yogurt or almond milk

Mix all the above ingredients in a blender. Easy as that.


donderdag 18 april 2013

Pinteresting: DIY plates

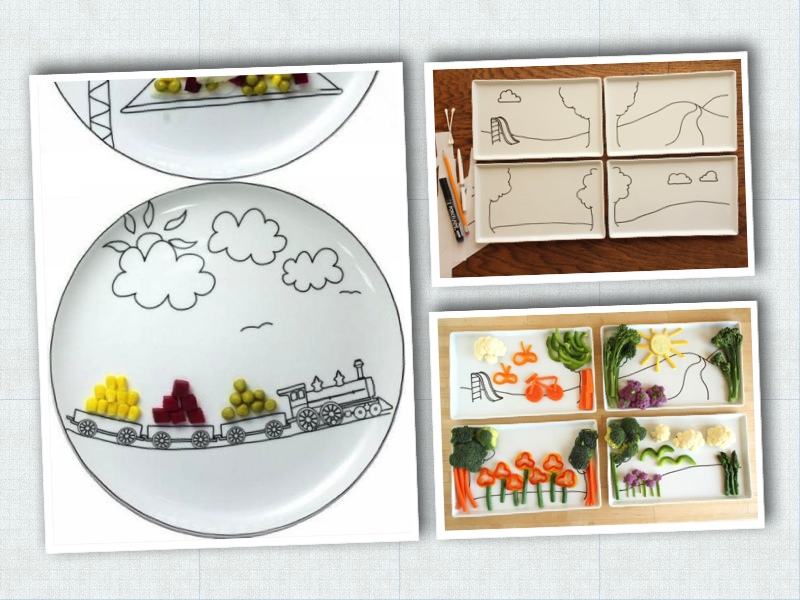
I found this cool idea on Pinterest for kids. The idea is to draw a landscape or something else on the plate and they can colour it in with their food. 
Inspiration from Pinterest.

I bought this 'glass and porcelain pen' from Panduro at a local craft shop. It says: "Clean the surface carefully. Shake the pen. Allow the design to dry for 4 hours. Harden in an oven for 90 min at 160° C. Place in a cold oven and begin timing once the required temperature is reached. Leave to cool in the oven with the door open."

Panduro pen

I made two designs on plain white plates.

It would be fun to 'decorate' them with a salad. Or you can use figures you use for cookies to make fun shapes out of bread or pancakes.


vrijdag 22 maart 2013

Organising your workspace

Some fun tips for organising your workspace.


An original way to display your pencils on your desk.


Do you have to take your pencils with you? Make an elastic band around your notebook or planner.


Don't want your magazines lying around? Use a close hanger to hang them on a wall or a cabinet. 


Never know which cable is which. Use a bread clip as a cord labeler. 


I love re-using things. Take cans and glue or screw them onto a board. Voila, the perfect place to store pencils.


woensdag 20 maart 2013

Changing the house

We might be changing up the house a little bit. Here are some impressions what the plans are.


Above you see an overall view. There are three main area's: The dining area, the living area and a music area.


First, the dining area. Right now we have quite big chairs. Using these IKEA chairs will be way more calm in the scenery. A nice lamp above the table will be great lighting for in the evenings. Also note the wooden barn door in the back. This will give a great option to separate two rooms when needed. 


The living room is kept clean and simple. I always love a big peace of artwork on the wall. A footstool is a great multifunctional object. You can use is as a footstool, table or as extra seating space. I still have to find a way to add the television in the room without it being so present. 


This little corner is a great place for a record player. On the wall above the record player shelfs can be added to display some records or pictures. A room isn't finished without some artwork, mirrors od pictures on the wall. When you only have furniture on the floor your eye will be drawn downwards. Make sure to put some elements on the wall or vertical elements like curtains in your room to make a balance.


dinsdag 12 maart 2013

The Candy Room (Melbourne)


I love this interior design. I love the fact that this interior combines 2D and 3D effects. It has a really surreal feeling to it.


The lamp is incredibly made. It really adds to the 2D feeling dimensions.


donderdag 13 september 2012

How to make a stamp!

Today I made my own stamp!! 

There is this awesome laser machine near my office. Here you see the rubber material. In the computer you can make a text or a drawing that the computer sends to the laser machine. 

The machine is located in "FabLab" an organization who makes it possible for everyone to use cool machines like this.


The machine gets rid of all the material I don't need. The result is a stamp of my logo.  I glued the stamp on a piece of wood. That way it is easy for me to stamp.
Before I glued the stamp on the wood I painted the wood and made a print of the stamp on the wood so I can see witch stamp it is.


And here is the final result!!!